Zif: A Drop-in Framework for DragonRuby GTK
Zif is a collection of features commonly required in 2D games. The name is a reference to Zero Insertion Force connectors used on the original Nintendo - You can drop it in your project and it should just work. Everything is namespaced to Zif so any existing classes or namespaces you have should be preserved.
This readme contains a basic overview of the functionality. If you are looking for more detail, please check the class API level documentation - e.g. Zif::Sprite.
The best version of this README is available here: https://danhealy.github.io/dragonruby-zif/
Full API documentation is available at https://danhealy.github.io/dragonruby-zif/docs/
Installation
Manually
If you like to manage your project dependencies manually, you can simply copy the source into your project.
- Download a copy of Zif somewhere:
git clone https://github.com/danhealy/dragonruby-zif.git. - Copy the content of Zif’s
libdirectory somewhere into your project. - In your
main.rb, require the parts of Zif you need. Or require everything usingrequire.rb.
Here is an example assuming you copied the content of Zif’s lib directory into lib/zif:
# This assumes your project looks like this:
# /
#   app/
#     main.rb
#   lib/
#     zif/
#       zif/
#       require.rb
#       zif.rb

# Require all of the Zif library:
require 'lib/zif/require.rb'

def tick
  # ....
end
If you only want to require some parts, please see the require.rb file for more information.
Using smaug
Simply add the following line to your project’s Smaug.toml under [dependencies]:
# This will install zif from the `main` branch.
# You can add an optional `tag = "vX.Y.Z"` if you want to use a specific release.
zif = { repo = "https://github.com/danhealy/dragonruby-zif" }
And then run smaug install to fetch Zif as a dependency.
This will automatically add all the necessary requires in your smaug.rb!
Example App
This repo also contains an example app showcasing the major features of Zif.
You can see the source code of this app in the app directory.
Running the Example App:
- Create a fresh copy of DragonRuby GTK - you can call this folder
dragonruby-zif-testbedand it should contain thedragonrubyexecutable. - Change directory in your terminal to
dragonruby-zif-testbed - Clone this entire
dragonruby-zifrepo inside thedragonruby-zif-testbeddirectory -git clone https://github.com/danhealy/dragonruby-zif.git. - Run using
./dragonruby dragonruby-zif/
Motivation
DragonRuby GTK provides the basic functionality you need to program a game. It has the concept of the tick loop, lets you render sprites to the screen by sending basic value objects to outputs, and so on.
There is a set of data and behavior that all sprites in your game share - they all have a position, they all have width and height, they all reference a path to some image, etc. Maybe you are working on a puzzle game - your puzzle pieces are sprites, but they share some additional behavior and data - which piece it is, how pieces can move. Why not leverage this similarity by formalizing the shared concepts in your game? You may want to consider using object-oriented design to encapsulate the distinct concepts in your code. After all, the Ruby programming language has a strong focus on supporting object-oriented programming techniques.
Zif aims to provide a framework for the shared concepts you might have in any game, as they relate to using the DragonRuby GTK. The foundation of Zif is the Zif::Sprite class, which defines the attributes a Sprite needs to have to work with DRGTK, and builds on that to provide some functionality not given to you directly by DRGTK. For example, maybe you want know the center point of your sprite? If you are only using the value objects expected by DRGTK, you defined it using x and y coordinates with some width and height, and that’s all it knows. If you define the same sprite using Zif::Sprite, you can use Zif::Sprite#center. This becomes more powerful as you build upon it. You could make a PuzzlePiece class which inherits from Zif::Sprite, and now it can also find it’s #center without any additional effort.
The major categories of concepts the Zif framework introduces are:
- Basic wrappers around DRGTK concepts like
Zif::Sprite,Zif::RenderTarget Zif::Actions, things which should change over time, possibly using using an easing functionZif::Layers, ways of organizing large sets of sprites, moving them in unison, and optimizing performanceZif::UIcomponents like labels, buttons and scalable windows- The
Zif::GameandZif::Sceneclasses which organize the game lifecycle Zif::Serviceswhich support your game by keeping track ofZif::Actions, inputs, your image assets, and performance
Finally, Zif has been designed to work as a whole, or by only bringing in the parts you need. There is some level of dependency relationships between these concepts (Zif::RenderTarget doesn’t work without Zif::Sprite, for example), but an effort was made to document this precisely, so you should be able to pick and choose only the concepts you want to use.
Feature Overview
Basic Features
Zif::Sprite
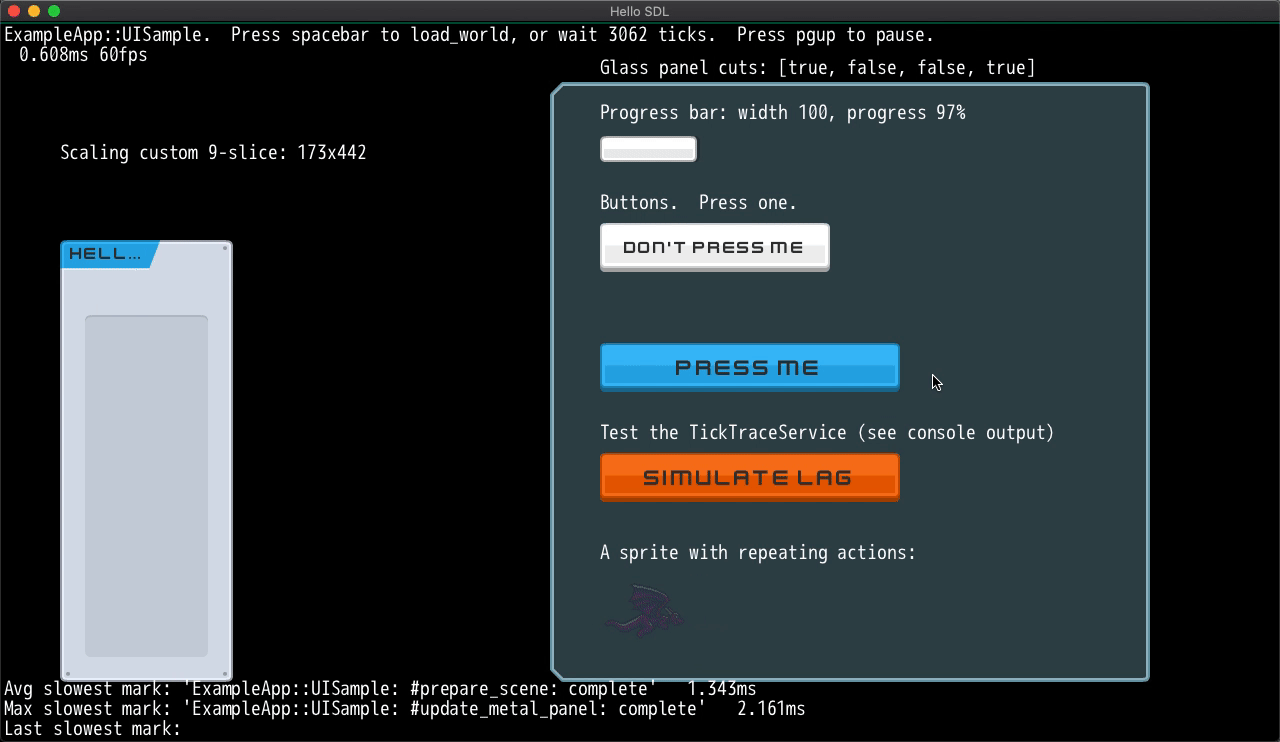
This class is the basis for most of the framework. It’s a basic sprite (using DRGTK’s attr_sprite ), which combines actions / animations, click handling, mass assignment and more.
Example usage:
dragon = Zif::Sprite.new.tap do |s|
  s.x = 300
  s.y = 300
  s.w = 82
  s.h = 66
  s.path = "sprites/dragon_1.png"
end
$gtk.args.outputs.sprites << dragon
See the documentation of Zif::Sprite for details.
See the ExampleApp::UISample scene for a working example.
Zif::CompoundSprite
This class acts like a (inherits from) Sprite but can itself accept a list of @sprites and @labels, like $gtk.args.outputs. Sprites and labels added to these arrays will be drawn using the CompoundSprite#draw_override method, which is checked by DragonRuby GTK during the draw cycle.
Example usage:
alduin = Zif::Sprite.new.tap do |s|
  s.x = 0
  s.y = 100
  s.w = 82
  s.h = 66
  s.path = "sprites/dragon_1.png"
end

bahamut = Zif::Sprite.new.tap do |s|
  s.x = 200
  s.y = 0
  s.w = 82
  s.h = 66
  s.flip_horizontally = true
  s.path = "sprites/dragon_1.png"
end

# Now we have 2 dragons facing each other, but we are not adding these
# to args.outputs.sprites individually.
# They are on a battlefield and can be moved in unison!
battlefield = Zif::CompoundSprite.new.tap do |cs|
  cs.sprites = [alduin, bahamut]
  cs.x = 130 # This causes bahamut to appear at x == 330 on screen
  cs.y = 20  # This causes alduin to appear at y == 120 on screen
  cs.w = 300 # Should be at least as wide as the farthest x value + width (200+82)
  cs.h = 200 # Should be at least as high as the largest y value + height (100+66)
  # No path is defined --
  # CompoundSprite is for organization only and does not display directly.
end

# Add the battlefield to outputs.
$gtk.args.outputs.sprites << battlefield
See the documentation for details: Zif::CompoundSprite
See the ExampleApp::CompoundSpriteTest scene for a working example.
![]()
Zif::RenderTarget
A render target in DRGTK is a way to programmatically create a static image out of sprites. It acts just like $gtk.args.outputs in that it accepts an array of sprites and other primitives. It gets rendered into memory at the end of the tick where it is referenced out of $gtk.args.outputs[...], based on its contents. To display the result, you need to send $gtk.args.outputs a sprite which references the name of the render target as its path.
Render targets are great for increasing the performance of your game by rendering a large collection of sprites once, and then just reusing that render later. It’s also good for displaying the same image composed of many sprites multiple times (think minimap or mirrors).
The Zif class Zif::RenderTarget wraps this functionality. It holds references to the Zif::RenderTarget#sprites and all of the configuration options necessary to invoke this concept in DragonRuby GTK. It also includes a Zif::Sprite referencing the created image in Zif::RenderTarget#containing_sprite.
Example usage:
paint_canvas = Zif::RenderTarget.new(
  :my_paint_canvas,
  bg_color: :white,
  width: 1000,
  height: 500
)
paint_canvas.sprites << @all_current_brushstrokes
paint_canvas.redraw
$gtk.args.outputs.static_sprites << paint_canvas.containing_sprite

# Some time later, you can add new brush strokes and delete a rectangle:

minimap = # ... a different sprite referencing the RenderTarget as path
new_brushstroke = # ... a new Sprite to add to the render
erase_rect = [200, 200, 10, 10] # Let's say you erased something, too
paint_canvas.redraw_from_buffer([new_brushstroke], erase_rect, [minimap])
See the documentation for details: Zif::RenderTarget
See the ExampleApp::DoubleBufferRenderTest scene for a working example.
Zif::Game
This is designed to be the base class for your game. It’s mainly responsible for Scene switching and yielding to Zif::Scene#perform_tick as described below, but also it automatically registers all the Zif::Services and provides standard functionality around this, including exception handling.
Example usage:
# =-=-=- In your app/my_game.rb -=-=-=
class MyGame < Zif::Game
  def initialize
    super()
    # do anything here, like register services...
    MyOneTime.setups

    # RainbowRoadScene is a Zif::Scene subclass
    register_scene(:rainbow_road, RainbowRoadScene)

    # (OpeningScene is also a Zif::Scene subclass)
    @scene = OpeningScene.new
  end
end

# =-=-=- In your app/main.rb -=-=-=
# Require all of the Zif library:
require 'lib/zif/require.rb'
require 'my_game.rb'
def tick(args)
  if args.tick_count == 2
    $game = MyGame.new
    $game.scene.prepare_scene # if needed on first scene
  end
  $game&.perform_tick
end
See the documentation for details: Zif::Game
See ExampleApp::ZifExample for a working example.
Zif::Scene
A Scene is a full-screen view of your game. The concept in Zif::Game is to show one Scene at a time. So each Scene in your game should be a subclass of Zif::Scene which overrides Zif::Scene#perform_tick. Using the structure in Zif::Game, #perform_tick comes after input handling and before updating Zif::Actions::Actionables. So your subclass should use #perform_tick to add/remove Zif::Clickables/Zif::Actions::Actionables, and respond to any detected input. Switching scenes is handled in Zif::Game, based on the return value of #perform_tick.
You can optionally define Zif::Scene#prepare_scene - a method invoked prior to the first tick it becomes the active scene, and Zif::Scene#unload_scene which is invoked after the Scene has been switched out.
Example usage:
class OpeningScene < Zif::Scene
  def initialize
    # If OpeningScene is registered by symbol using Zif::Game#register_scene,
    # this initialize will happen each time the game switches to this scene.
    # Otherwise you could instantiate this scene somewhere and simply
    # return it from another scene's #perform_tick
    @dragon = Zif::Sprite.new # ....
    @hello = Zif::UI::Label.new("Hello World!").tap do |label|
      label.x = 100
      label.y = 100
    end
    @current_scene_tick_count = 0
  end

  def prepare_scene
    # You probably want to remove the things registered with the services when
    # scenes change. You can remove items explicitly using #remove_.., but
    # #reset_.. will clear everything. You can also do this when a scene is
    # being changed away from, using the #unload_scene method.
    $game.services[:action_service].reset_actionables
    $game.services[:input_service].reset
    $gtk.args.outputs.static_sprites.clear
    $gtk.args.outputs.static_labels.clear

    # Now you can use this to do one-time setup code.
    $game.services[:action_service].register_actionable(@dragon)
    $game.services[:input_service].register_clickable(@dragon)

    # Best practice is to use static outputs, this gives you a lot more
    # performance and there is no need to append to the array inside
    # #perform_tick. The only downside is that you have to manage this list
    # manually.  You can remove sprites at any time in #perform_tick.
    $gtk.args.outputs.static_sprites << @dragon
    $gtk.args.outputs.static_labels << @hello
  end

  def perform_tick
    @current_scene_tick_count += 1
    @hello.text = "Hello World! #{@current_scene_tick_count}"

    # Tell Zif::Game to attempt to switch to the scene registered with the name
    # :rainbow_road after some time
    return :rainbow_road if @current_scene_tick_count > 200
  end
end
See the documentation for details: Zif::Scene
See ExampleApp::ZifExampleScene for a working example - this scene class is shared amongst the example app, so it’s designed around the auto-advancing scene behavior.
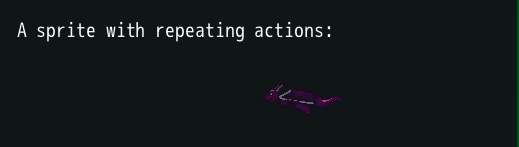
Zif::Actions (aka tweening, easing)
Inspried by SpriteKit’s Actions and Squirrel Eiserloh’s GDC talk on nonlinear transformations.
Zif::Actions::Action & Zif::Actions::Actionable
An Action is a transition of a set of attributes over time using an easing function (aka tweening, easing).
Your objects can accept Actions by mixing in Zif::Actions::Actionable and calling the Zif::Actions::Actionable#run_action method. You can specify the number of times the Action should be repeated, and set a callback for when the Action is finished.
An Actionable can have several Actions running simultaneously, and they can be started and stopped manually.
Example usage:
# @dragon is a Zif::Sprite and therefore an Actionable, and already registered
# with the ActionService.  Move from starting position to 1000x over 1 second,
# starting slowly, then flip the sprite at the end.  Note that starting
# position is just taken from the current state of @dragon rather than
# specified.
@dragon.run_action(
  @dragon.new_action({x: 1000}, duration: 1.seconds, easing: :smooth_start) do
    @dragon.flip_horizontally = true
  end
)
See the documentation for details: Zif::Actions::Action, Zif::Actions::Actionable, Zif::Services::ActionService
Take a look at the code for @dragon inside ExampleApp::UISample for a simple working example.
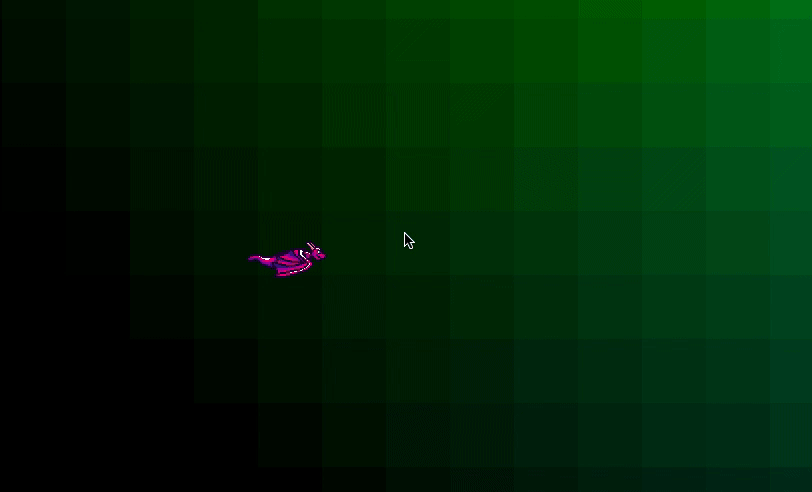
More complicated examples can be seen in ExampleApp::World - The dragon is using Actions to move across the map, and the map itself is panning to track the dragon using Actions. The ExampleApp::Pixie class demonstrates using the follow: param to set the finish condition based on another object.
Zif::Actions::Sequence
A Sequence is a series of Zif::Actions::Action to be run in order. Behaves like an Action, you run it using the same Zif::Actions::Actionable#run_action method. You can specify the number of times the sequence should be repeated, and set a callback for when the sequence is finished.
Example usage:
@dragon.run_action(
  Zif::Actions::Sequence.new(
    [
      # Move from starting position to 1000x over 1 second, starting slowly,
      # then flip the sprite at the end
      @dragon.new_action(
        {x: 1000},
        duration: 1.seconds,
        easing: :smooth_start
      ) { @dragon.flip_horizontally = true },
      # Move from the new position (1000x) back to the start 600x over 2
      # seconds, stopping slowly, then flip again
      @dragon.new_action(
        {x: 600},
        duration: 2.seconds,
        easing: :smooth_stop
      ) { @dragon.flip_horizontally = false }
    ],
    repeat: :forever
  )
)
See the documentation for details: Zif::Actions::Sequence
Again, take a look at the code for @dragon inside ExampleApp::UISample for a simple working example.
Zif::Actions::Animatable
Animatable is a mixin to assist with sprite animations. Under the hood, these are implemented as Zif::Actions::Sequences which modify the path over time, and they are registered using a name.
Example usage:
# Register the animation for a flying Dragon.
 @dragon.new_basic_animation(
   named: :fly,
   paths_and_durations: [
     #   +-- path for this frame
     #   |        +-- duration for this frame
     #   v        v
     ["dragon_1", 4], # This animation uses 4 separate image files
     ["dragon_2", 4], # Hold each frame for 4 ticks
     ["dragon_3", 4], # The actual image exists at: app/sprites/dragon_3.png
     ["dragon_4", 4],
     ["dragon_3", 4],
     ["dragon_2", 4]  # Repeats forever, which takes it back to 1
   ]
 )

 # We don't have to register this sequence manually using
 # #register_animation_sequence, the #new_basic_animation method takes care of
 # that for us.

 # So now we can run this animation:
 @dragon.run_animation_sequence(:fly)
See the documentation for details: Zif::Actions::Animatable
Zif::Layers
If your game’s play area extends beyond the screen resolution, you likely want some way of managing this! Zif::Layers are designed for this use case. They provide several different strategies for performantly rendering large numbers of sprites, organizing them by a Z-index, and moving them in unison via the Zif::Layers::Camera class.
Zif::Layers::LayerGroup
Creates a set of overlapping play area layers based on Zif::Layers::SimpleLayer (Zif::RenderTarget) or Zif::Layers::ActiveLayer (Zif::CompoundSprite) and handles redrawing them.
Has a concept of logical position as a multiple of tile width/height, applicable to any Zif::Layers::Tileable layers. For example, if your tiles are 16px wide, the 5th tile is at @logical_x==4 but at @x==64 on the layer.
Example usage:
tile_width_and_height         = 64  # Each tile is 64x64 pixels
map_width_and_height_in_tiles = 100 # 64 * 100 = 6400x6400 pixels, 10000 tiles

@map = Zif::Layers::LayerGroup.new(
  tile_width:     tile_width_and_height,
  tile_height:    tile_width_and_height,
  logical_width:  map_width_and_height_in_tiles,
  logical_height: map_width_and_height_in_tiles
)

# This example is only using Zif::Layers::ActiveLayer because they are easier
# to set up, and it is a good place to start in terms of performance.
@map.new_active_tiled_layer(:tiles)
@map.new_active_layer(:avatar)

@map.layers[:avatar].source_sprites = [@dragon]

# Add a bunch of tiles
a_new_tile = Zif::Sprite.new....
@map.layers[:tiles].add_positioned_sprite(
  sprite: a_new_tile,
  logical_x: x,
  logical_y: y
)

# Set up a camera
@camera = Zif::Layers::Camera.new(
  layer_sprites: @map.layer_containing_sprites,
  initial_x: 1800,
  initial_y: 1200
)

$gtk.args.outputs.static_sprites << @camera.layers

# All set!  You can move your sprites (like @dragon) around.
#  You can control the Camera using actions.
# Most or all of the above code could be placed in a Zif::Scene#prepare_scene
See the documentation for details: Zif::Layers::LayerGroup
See ExampleApp::World for a working example.
Zif::Layers::SimpleLayer
This layer is based on Zif::RenderTarget and therefore the component sprites will not be rendered until Zif::RenderTarget#redraw or Zif::RenderTarget#redraw_from_buffer is called - typically via Zif::Layers::SimpleLayer#rerender.
See the documentation for details: Zif::Layers::SimpleLayer
Zif::Layers::ActiveLayer
In contrast to Zif::Layers::SimpleLayer, Zif::Layers::ActiveLayer is built on Zif::CompoundSprite and therefore must rerender every sprite on every tick. This is balanced by not incurring a performance / memory penalty by rendering a sprite the size of the entire Zif::Layers::LayerGroup width times height.
See the documentation for details: Zif::Layers::ActiveLayer
Deciding between Zif::Layers::SimpleLayer & Zif::Layers::ActiveLayer
This depends on your application. In general, try organizing your layers into those that don’t change at all, or only change when action (like camera movement) isn’t happening, and put those sprites into a Zif::Layers::SimpleLayer. Then take all of the sprites which do need to change often, or are necessary for action, and put those in Zif::Layers::ActiveLayers.
You can use either Zif::Layers::SimpleLayer or Zif::Layers::ActiveLayer directly when the sprites contained don’t need to snap to the tile grid set up in the Zif::Layers::LayerGroup.
Zif::Layers::Tileable
The Tileable mixin provides functionality to Layers to support a grid organization. The two classes based on the Tileable mixin are Zif::Layers::TiledLayer and Zif::Layers::ActiveTiledLayer.
If your sprites need to snap to a grid, you should use one of these. See the section above for tips on choosing one or the other.
See the documentation for details: Zif::Layers::Tileable, Zif::Layers::TiledLayer, Zif::Layers::ActiveTiledLayer
Zif::Layers::Bitmaskable
A layer which extends Tileable, where the sprites are chosen automatically via bitmasked adjacency rules on the presence data layer - otherwise known as Autotiling.
A detailed explanation of this technique is described in the class documentation for Zif::Layers::Bitmaskable and at this resource:
https://gamedevelopment.tutsplus.com/tutorials/how-to-use-tile-bitmasking-to-auto-tile-your-level-layouts–cms-25673
This mixin is included in Zif::Layers::BitmaskedTiledLayer and Zif::Layers::ActiveBitmaskedTiledLayer.
Zif::Layers::Camera
The Camera is given a set of sprites, typically the containing sprites for a set of Zif::Layers::Layerables via Zif::Layers::LayerGroup#layer_containing_sprites.
It is responsible for directing the layers to reposition based on camera movements. Specifically, it alters each layer’s source_x and source_y values for panning.
This class includes Zif::Actions::Actionable, so you can pan the camera using a Zif::Actions::Action.
It has the capability of issuing camera movements based on following a particular sprite on a layer (like a player character).
It also has the capability of zooming in and out, by controlling each layer’s source_w and source_h. It can be registered as a scrollable with Zif::Services::InputService.
Example usage:
# Using the setup example from Zif::Layers::LayerGroup
# Assumes @camera has been registered as an actionable
@camera.start_following(@dragon)
See the documentation for details: Zif::Layers::Camera
A working example is available in ExampleApp::World.
Zif::UI
Simple UI components. Examples for these classes exist in ExampleApp::UISample.
Zif::UI::Label
A wrapper for the label DRGTK primitive: displaying text using a font, size, alignment, color. Includes Zif::Actions::Actionable! Supports text truncation by calculating it’s own width, and supports word wrapping.
See the documentation for details: Zif::UI::Label
Zif::UI::Input
This is a Label which includes Zif::KeyPressable and will add the keys being pressed to itself. Useful for form fields. You must manually manage its registration with the Zif::Services::InputService as well as control its focus via @has_focus.
See the documentation for details: Zif::UI::Input, Zif::KeyPressable
A working example is available in ExampleApp::UISample, implemented by ExampleApp::FormField and ExampleApp::FocusCheck

Zif::UI::TwoStageButton
This is the classic UI button, which has two sprites: a normal state, and a pressed state. It accepts a label which is centered by default.
This is implemented using Zif::CompoundSprite, so it is a Zif::Clickable, and by default it has already set up the click handlers to handle switching states based on clicks. You can pass a block to the constructor, this will be executed if the button is clicked and the mouse click goes up within the rectangle of the button. (You can click down on the button, move the mouse outside, and let go - it will not trigger the callback in this case.)
See the documentation for details: Zif::UI::TwoStageButton

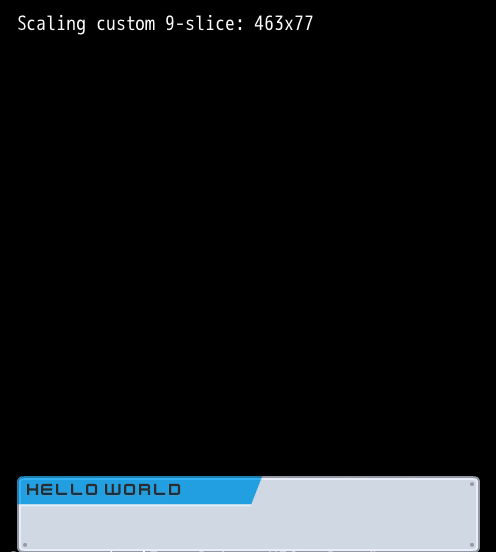
Zif::UI::NinePanel
Nine-slice sprites, built on Zif::CompoundSprite: https://en.wikipedia.org/wiki/9-slice_scaling
Because the implementation of this partially depends on the visual assets you are using, this is an abstract class. You are expected to subclass this to:
- override
#initializewithsuperto set the@corners,@edgesand@fillwith sprites - override
#resize_widthand#resize_heightto manage resizing the above sprites in a sensible way
Ideally, these corners and edges would be Zif::Sprites and therefore Zif::Clickables - you could use this to implement click & drag, or drag-to-resize using the resize methods.
See the documentation for details: Zif::UI::NinePanel
Zif::Services & Zif::Services::ServiceGroup
Services are game utilities which can be accessed from any context within your app.
If you use Zif::Game, every Zif service will be set up for you using Zif::Services::ServiceGroup, and registered in the Game’s instance variable @services named by a symbol. For example, you will be able to access the Zif::Services::ActionService by $game.services[:action_service]. This is because Zif::Game runs @services.register(:action_service, Zif::ActionService.new) during initialization, and by convention, both $game and $services are available as global variables.
See the documentation for details: Zif::Services::ServiceGroup
Zif::Services::ActionService
See Zif::Actions above for more information on Actions.
Each tick, checks sprites which have been registered for running actions.
If you are using Zif::Game, this service is registered as :action_service. All you need to do is register any object which needs to be checked for running Actions by using Zif::Services::ActionService#register_actionable.
If you are not using Zif::Game, ensure you are calling Zif::Services::ActionService#run_all_actions once per tick.
See the documentation for details: Zif::Services::ActionService
Zif::Services::InputService
Keeps track of sprites and other objects interested in responding to clicks and scroll events, and passes the events over to them when they occur.
If you are using Zif::Game, this service is registered as :input_service. All you need to do is register any sprite which needs to respond to clicks or scrolls using Zif::Services::InputService#register_clickable and #register_scrollable.
Clickable sprites should mixin Zif::Clickable or be compatible by defining a #clicked? method and @on_mouse_up instance variable callbacks. All Zif::Sprites follow this convention.
Scrollable objects should define #scrolled?. Zif::Layers::Camera uses this.
Objects which should receive key presses should mixin Zif::KeyPressable.
See the documentation for details: Zif::Services::InputService, Zif::Clickable, Zif::KeyPressable
Zif::Layers handle clicks in a hierarchical way, see documentation for info.
There are many working clickable examples in the ExampleApp.
Zif::Services::SpriteRegistry
This service is for registering your sprite assets once, and assists in creating new Zif::Sprite instances from the parameters described when registering.
Example usage:
The following code will create a Zif::Sprite with width and height of 82px and 66px, referencing a path of sprites/dragon_1.png. The second line demonstrates getting a fresh Zif::Sprite copy with these settings.
$services[:sprite_registry].register_basic_sprite("dragon_1", width: 82, height: 66)
@dragon = $services[:sprite_registry].construct("dragon_1")
The autotiling feature of Zif::Layers::Bitmaskable is designed around having the tile assets registered in this service.
See the documentation for details: Zif::Services::SpriteRegistry
Zif::Services::TickTraceService & Zif::Traceable
Generally, you want your game to run at a full 60fps. If your tick takes longer than 16.6ms, you’ll drop below that number. This service is designed to report when a tick has taken longer than a threshold (20ms by default), and hopefully narrow down the slowest section of code. Zif::Services::TickTraceService#reset_tick must be called at the beginning of a tick, and then #finish at the end. If you use Zif::Game, this is done for you.
The Zif::Traceable mixin helps you use this service from an object, all you need to do is include Zif::Traceable in any class you want to mark, set the @tracer_service_name ivar to :tracer, and then mark('a section of code'). By convention, you should include the name of the method which calls #mark: mark('#my_method: a section of code')
Zif::Traceable#mark_and_print is also available, if you want to print to the console when you mark the section.
Example output:
The ExampleApp::UISample scene includes a little button to simulate a slow tick (it sleeps for half a second). This is the console output from clicking that button.
ExampleApp::UISample: delay_button: Button was clicked - demonstrating Tick Trace service
ExampleApp::UISample: delay_button: Woke up from 500ms second nap
================================================================================
Zif::Services::TickTraceService: Slow tick. 504.920ms elapsed >  20.000ms threshold, longest step 'ExampleApp::UISample: delay_button: Woke up from 500ms second nap' 503.468ms:
       mark     delta label
    0.016ms   0.016ms ExampleApp::ZifExample: #standard_tick: begin
    0.895ms   0.879ms ExampleApp::UISample: delay_button: Button was clicked - demonstrating Tick Trace service
  504.363ms 503.468ms ExampleApp::UISample: delay_button: Woke up from 500ms second nap
  504.406ms   0.043ms ExampleApp::ZifExample: #standard_tick: input_service #process_click
  504.420ms   0.014ms ExampleApp::UISample: #perform_tick: begin
  504.445ms   0.025ms ExampleApp::UISample: #update_metal_panel: begin
  504.507ms   0.062ms ExampleApp::UISample: #update_metal_panel: complete
  504.519ms   0.012ms ExampleApp::UISample: #update_glass_panel: begin
  504.552ms   0.033ms ExampleApp::UISample: #update_glass_panel: complete
  504.564ms   0.012ms ExampleApp::UISample: #update_progress_bar: begin
  504.612ms   0.048ms ExampleApp::UISample: #update_progress_bar: complete
  504.624ms   0.012ms ExampleApp::UISample: #update_interactable_button: begin
  504.636ms   0.012ms ExampleApp::UISample: #update_interactable_button: complete
  504.646ms   0.010ms ExampleApp::UISample: #perform_tick: finished updates
  504.742ms   0.096ms ExampleApp::UISample: #perform_tick: finished super
  504.754ms   0.012ms ExampleApp::ZifExample: #standard_tick: Scene #perform_tick complete
  504.772ms   0.018ms ExampleApp::ZifExample: #standard_tick: Scene switching handled
  504.901ms   0.129ms ExampleApp::ZifExample: #standard_tick: Action service complete
  504.920ms   0.019ms ExampleApp::ZifExample: #standard_tick: Complete
See the documentation for details: Zif::Services::TickTraceService, Zif::Traceable
Coming Soon
Some features and things being considered for this library:
- Official support and/or examples for integrating with Draco ECS, and with Tiled tilemaps
- Parallax camera example
- Physics, or acceleration equivalent of Actions
- Ports of DRGTK Sample apps to “Zif style”
If these sound interesting to you, make some noise in the Dragonruby GTK Discord #oss-zif channel.
Development
Dependencies
For development you should install the dependencies using Bundler. Ensure you have a recent (> 2.7) version of Ruby installed, and run bundle install to install the dependencies.
If EventMachine won’t install, on MacOS at least, try:
brew install openssl@1.1
gem install eventmachine -- --with-openssl-dir=$(brew --prefix openssl@1.1)
and then bundle install again.
Testing
Tests can be found in the tests directory.
To execute the tests use the following command:
./dragonruby ./path/to/dragonruby-zif --test tests/zif.rb`
Linting
This project is linted with RuboCop.
To execute RuboCop run
rubocop -D
Documentation
If you make changes to the docs, you can use the following commands to regenerate and preview them:
yardoc -o docs --readme API_README.md
bundle exec jekyll serve